Summer Audiophile house mix 2023
The summer is finally here in the UK. Here is an all Vinyl chilled House selection all mixed on audiophile gear

This was mixed on a master sounds two valve mixer using HifiMan Sundara closed headphones and Custom cans Litz cable, monitored on frugal horn speakers. The mixer was linked to a scarlet 2 by custom balanced litz cables. It was filmed on a blackmagic cinema camera fitted with vintage Russian f2.8 fish eye goodness for that warm soft vintage look. Some of the records were “well loved” so not always the best sound but it has that vinyl feel all the way through for a deeply nutritious listen
https://www.youtube.com/watch?v=NLvGES7TyNs
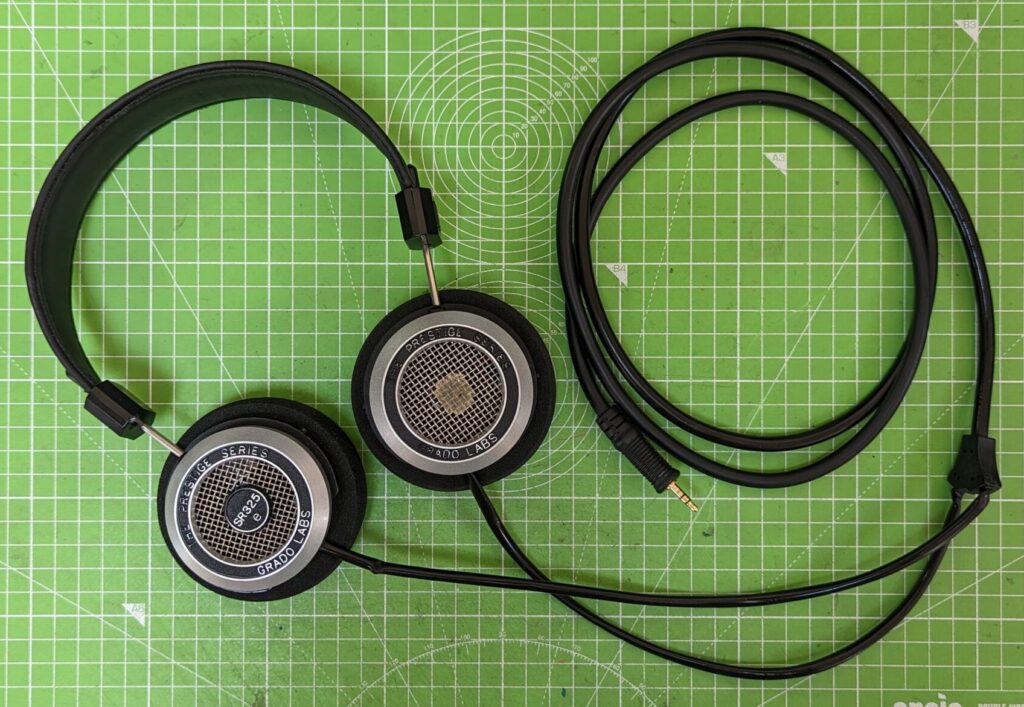
Grado SR325e Cable Upgrade
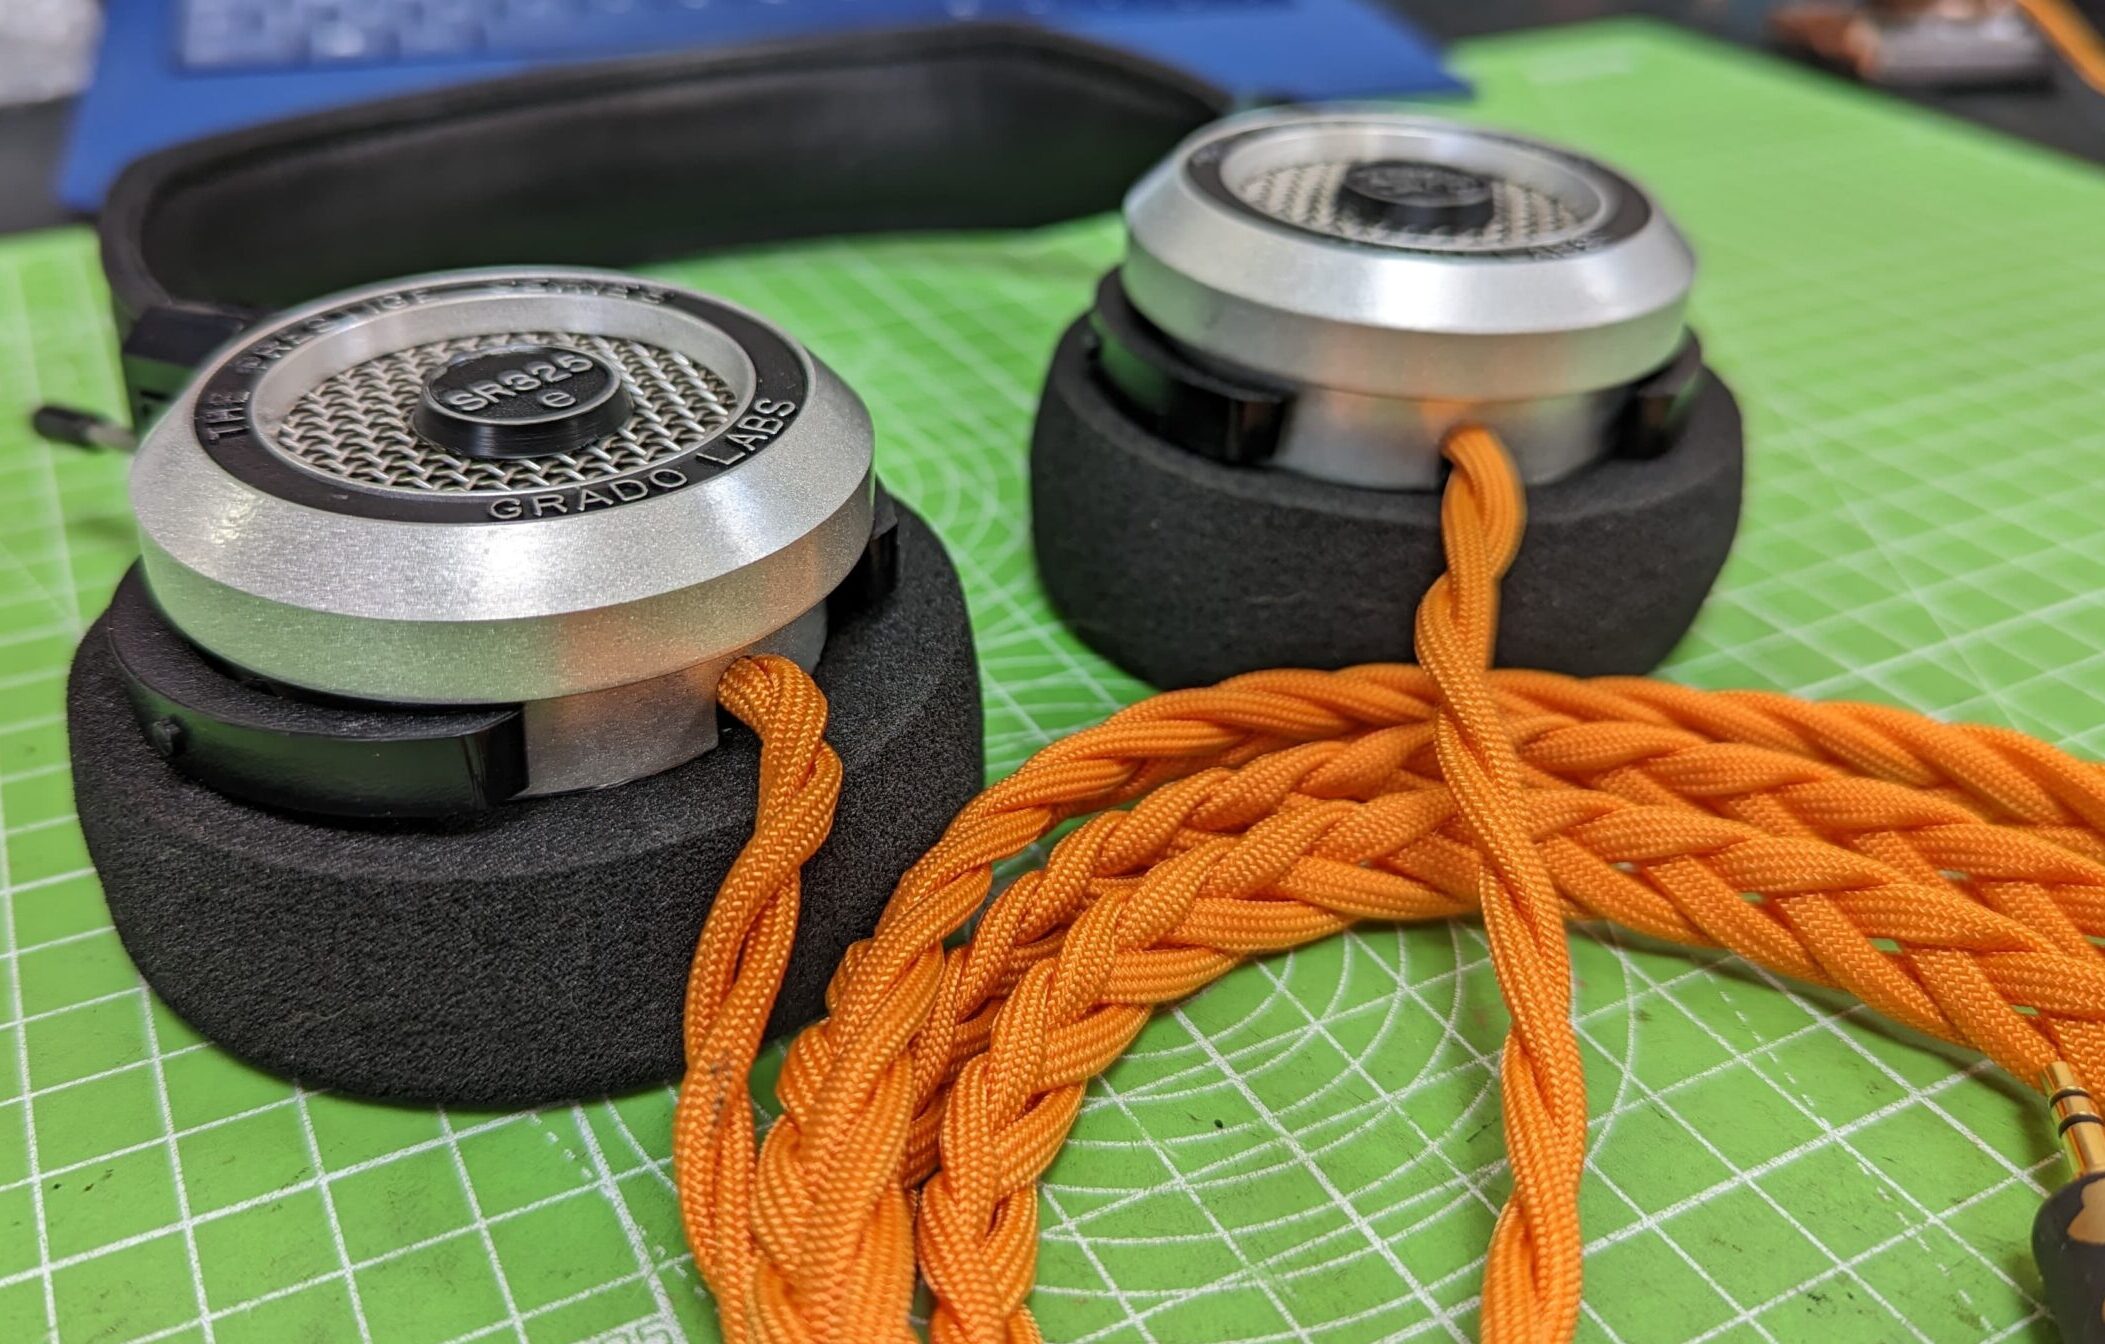
Here is how we replace the cable on a pair of Grado SR325e’s. We’d recommend giving this a go on all of the plastic and metal body Grados. It’s a shockingly easy mod and all you will need is a bit of soldering know-how.
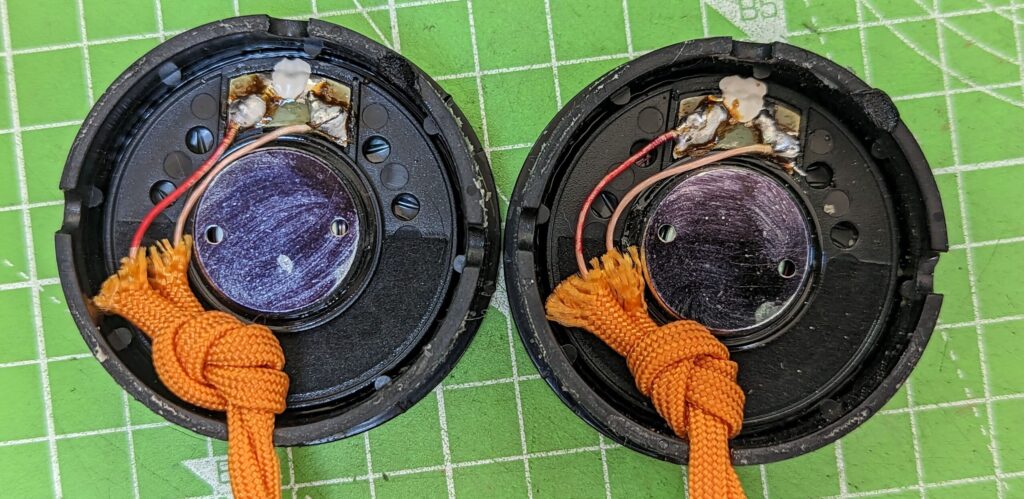
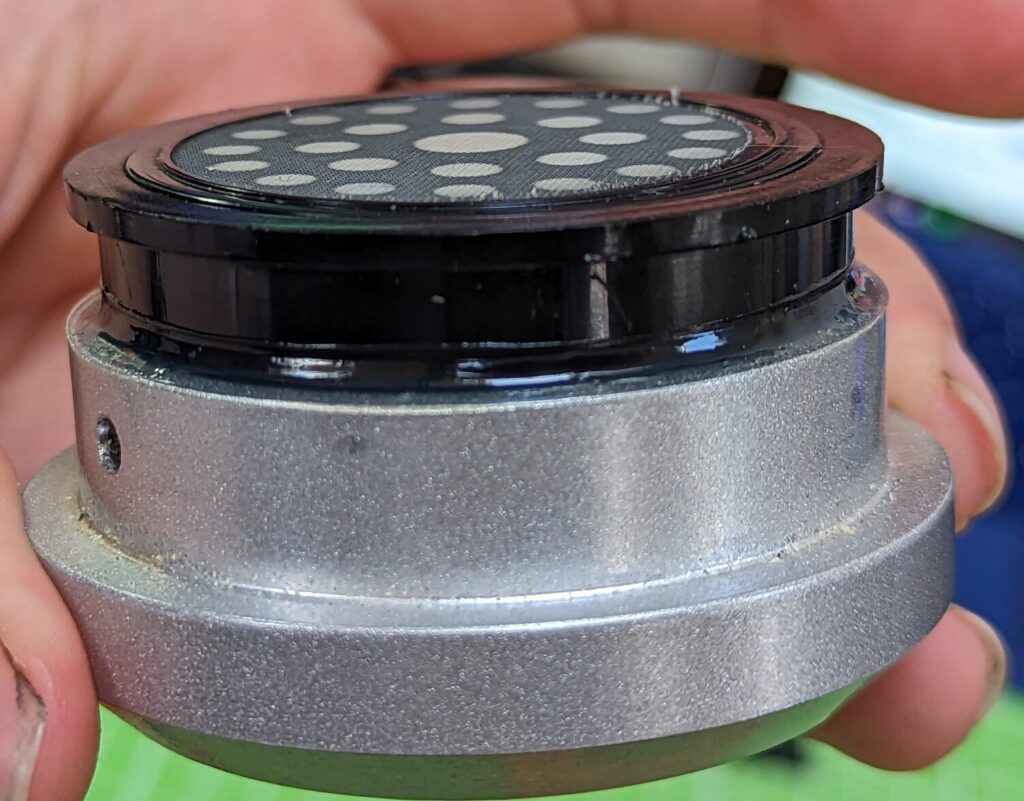
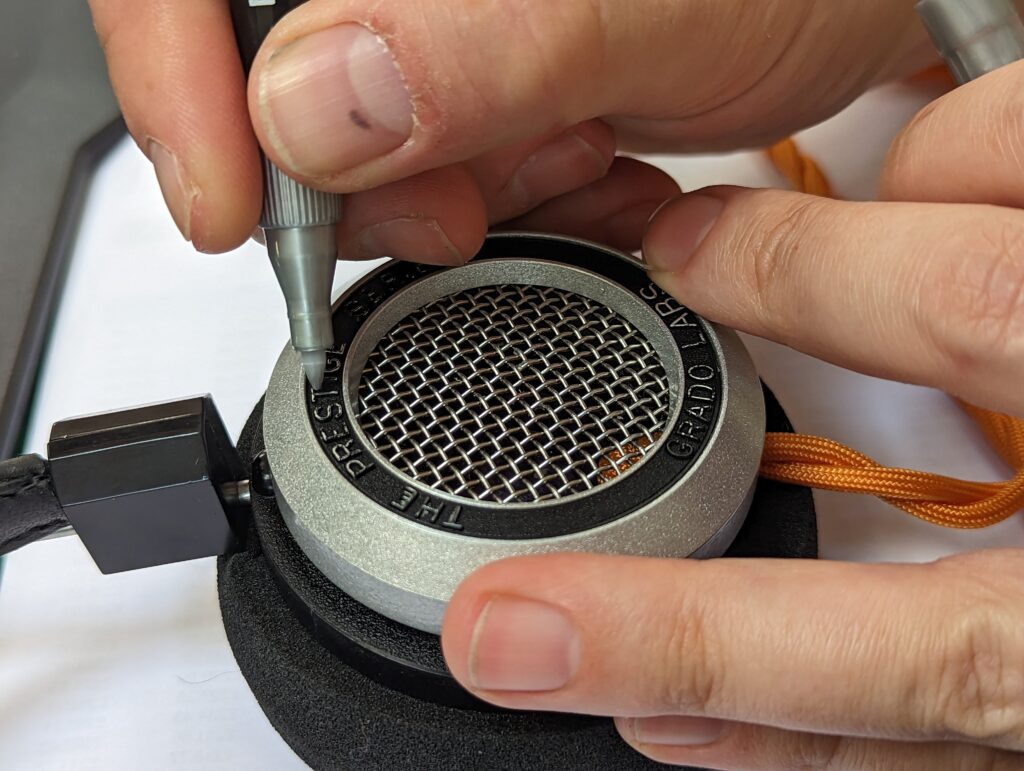
We start with a rather sad looking pair of SR325e’s. The cable has become completely petrified and sticky and has even cracked in some parts. This is the fate of all Grados. The nameplate is also missing on one of the cups.
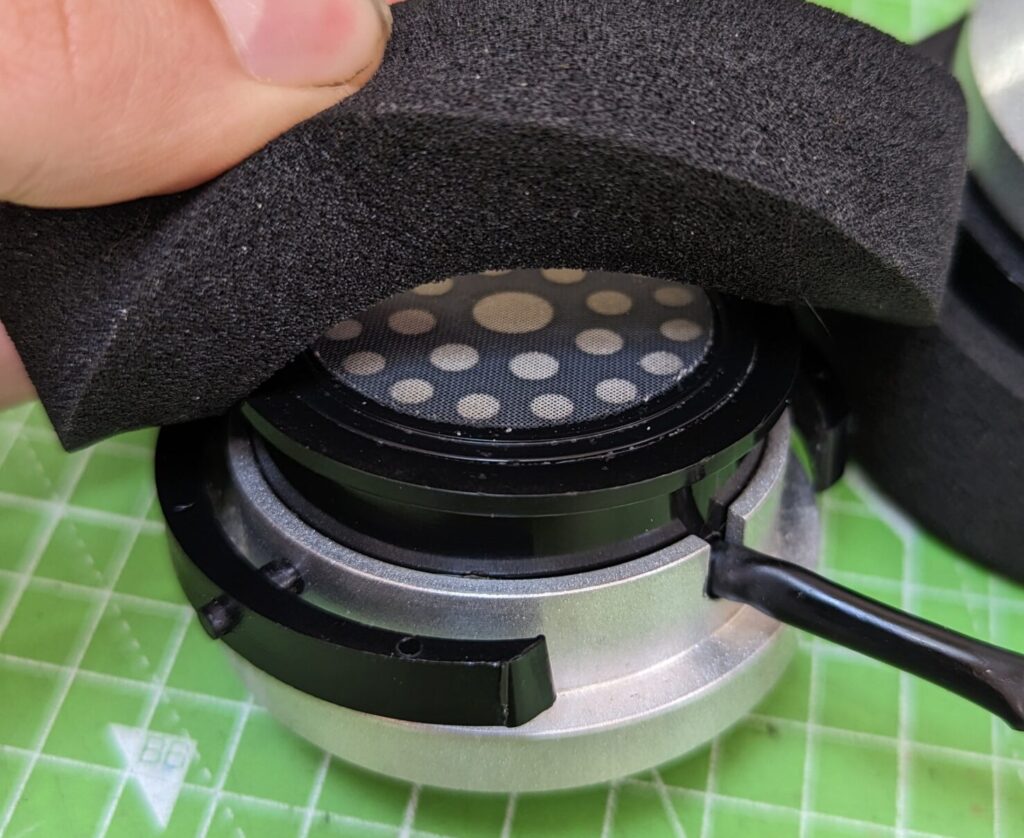
First, pull the pads off. This is just a tension fit and you have probably had these come off by accident at some point or another.
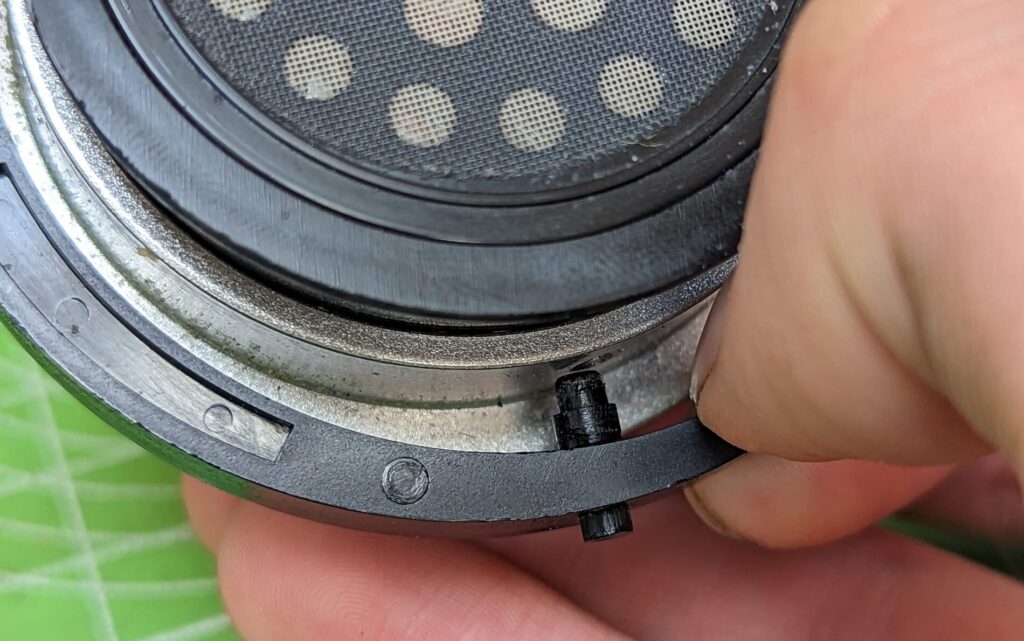
Lever the fork out just enough to pull the hinge pin out of the housing. Slide it upward into the groove left by the pad before repeating for the other side. Then you should be able to pull the whole fork upwards and away from the driver.
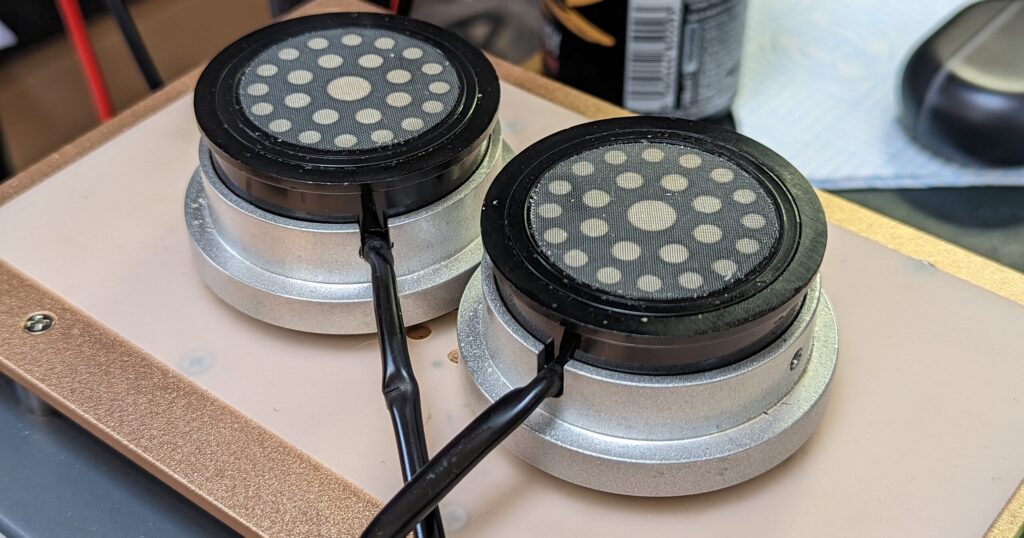
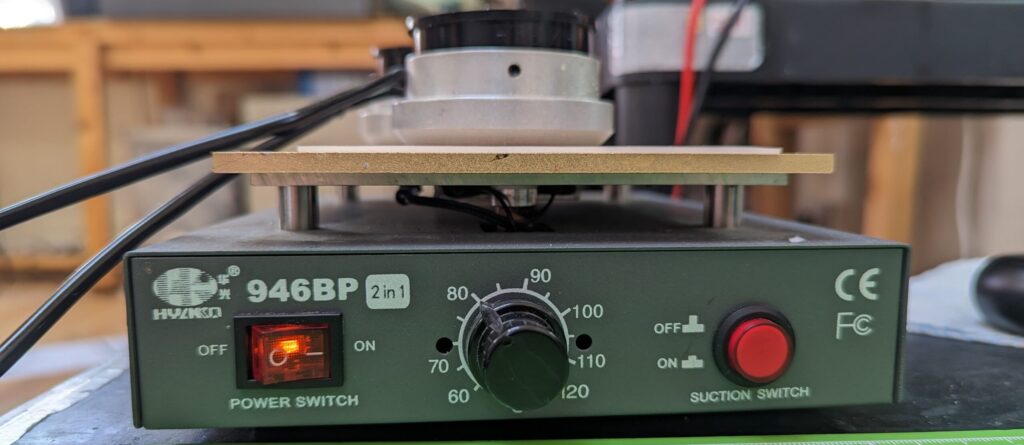
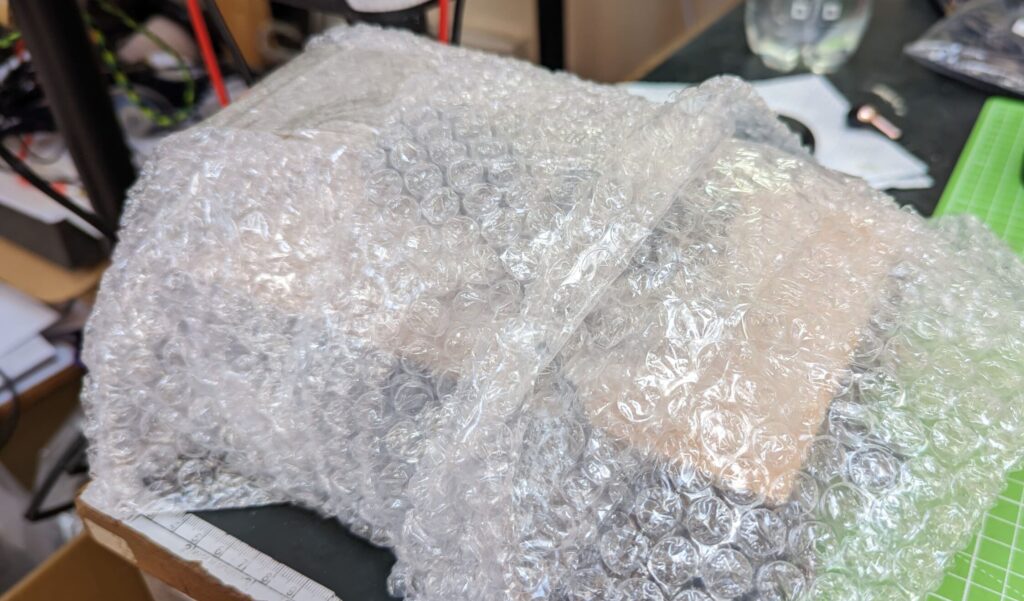
Pop both the earcups on a heat plate set to 80 Celsius. We have found that any higher warps the driver and any lower does nothing. This works best on the metal Grados as the heat conducts well to the layer of glue holding the plastic into the metal housing. On plastic Grados this often is not needed and you can just pull them apart with some mechanical advantage. Once they are on the plate, we tuck them into a bubble-wrap bed to heat up a bit faster and more evenly.
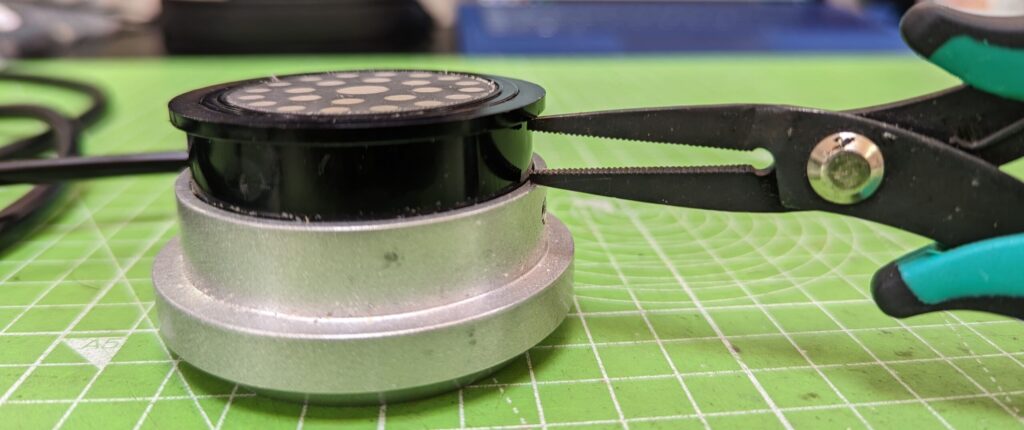
Once the drivers are roasty toasty, I take a pair of pliers and use them the wrong way to apply a spreading force in the ledge pictured. Do this little by little around the whole driver to slowly move them up. If you feel it is not moving, you may need more heat. Try to keep force to a minimum to avoid breaking the plastic lip at the top.
Like most things, it happens not at all, then all at once.
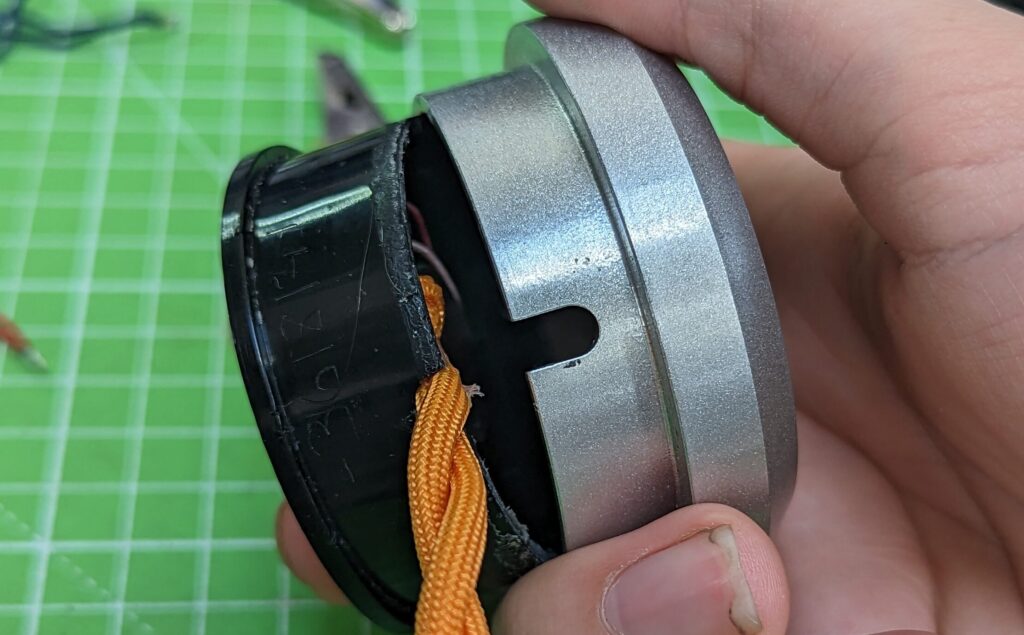
The two parts will fully seperate and you will find a gluey mess inside.
Just for convenience, I snip the old cable around here just to get it out of the way although I will be removing it all together later. This just helps to remember the polarity of the drivers.
You want to get rid of this glue ring that was holding in the driver. The best way to do this is with some IPA isopropyl alcohol. A dab will totally dissolve the bond and you can pull it out in one satisfying ring.
So satisfying
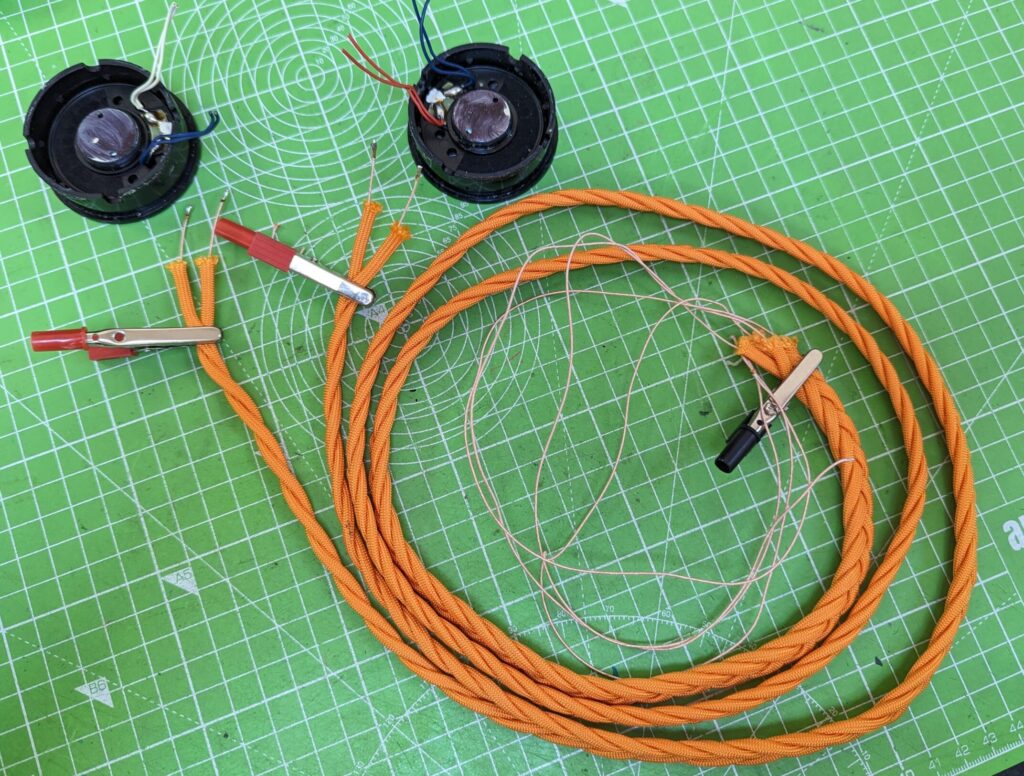
I made up one of our braided cables to be used as the replacement. We have a bunch of posts about how we make these in both video and blog flavour. If you are interested in doing this, you can make your own following one of these or we can sell you one. Just pop us an email. Alternatively, you can find any headphone cable that splits in two and chop the ends off. I would imagine a HD600 cable would work well for this.
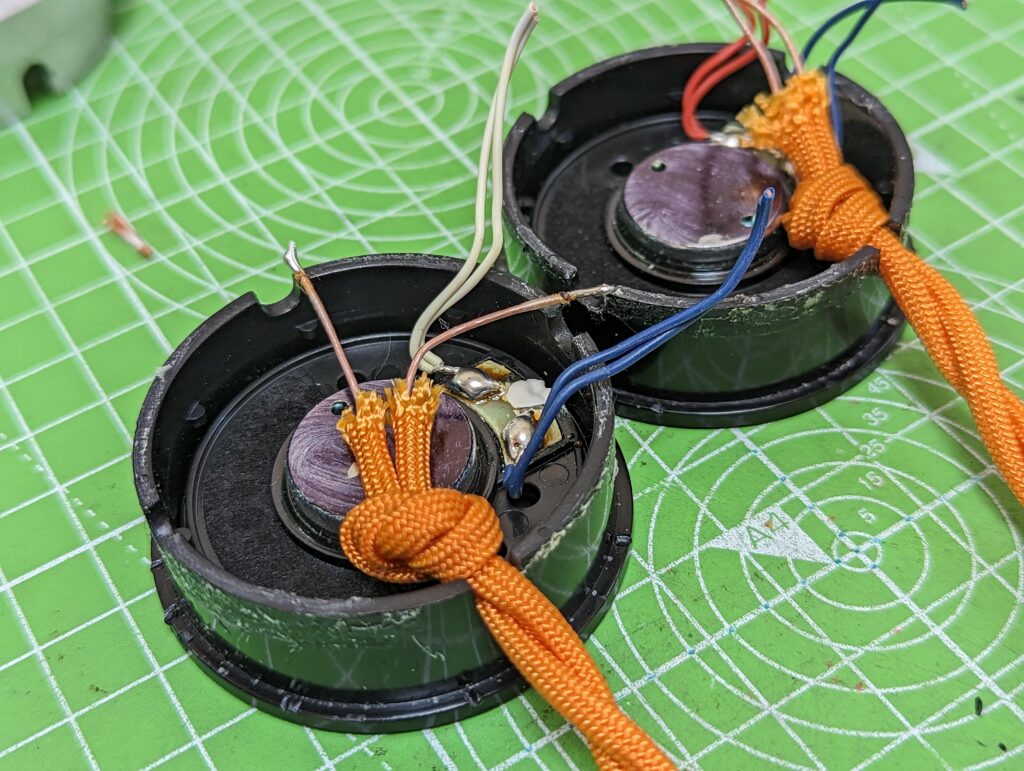
I tied a knot in the cable and sat it in one of the groves in the housing. You absolutely need to ensure there is ample strain relief and the cable will not be pulling on the solder joints. A sturdy knot will work well but you can also use zip-ties or glue. If you miss this step, you will soon be furthering your DIY skills with a driver swap.
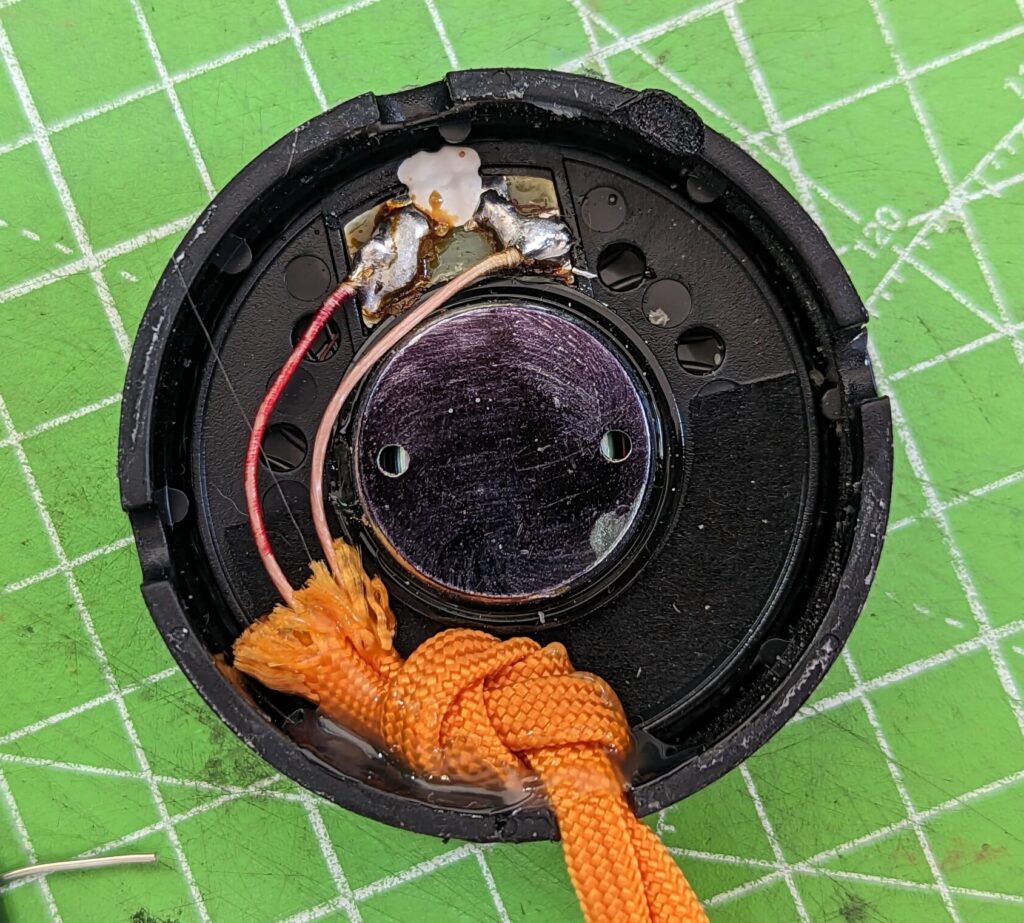
I de-soldered the old wires and soldered on the new ones. Make sure to observe the polarity of the drivers. The blue wires are negative on all Grados. I made sure to heat up the solder joint as little as possible to reduce the chance of the coil wire breaking. I have not had this happen yet but someday I will get too confident and break a pair. I also put a bit of glue on the knot to help it stay in place.
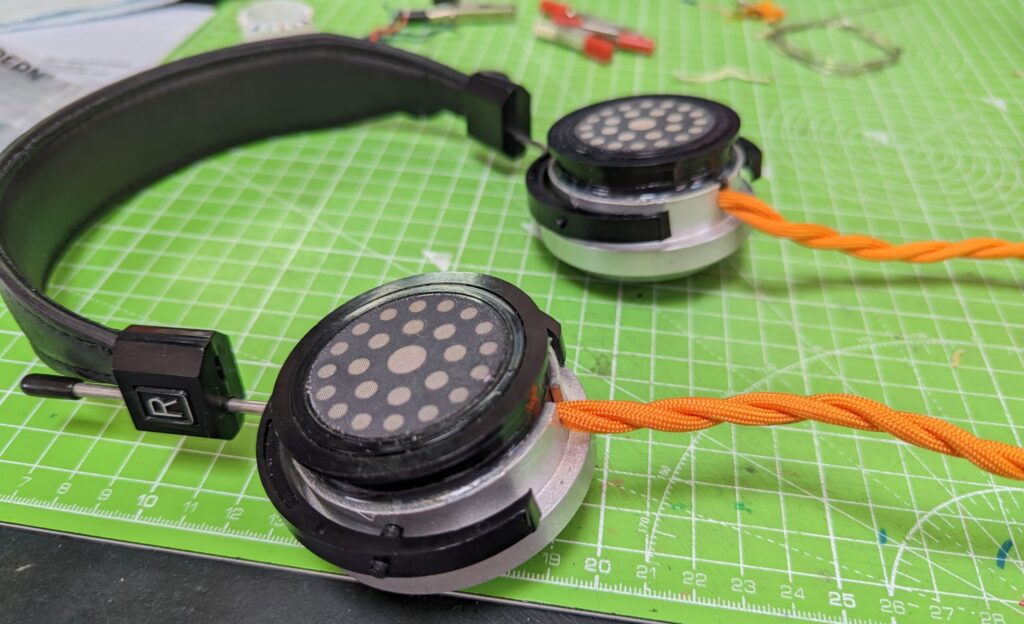
Both drivers ready for re-assembly.
When reassembling the drivers, make sure to match the cable to the cutouts on both halves. No glue is needed at this step. Just push the two halves together.

You should have about 1 Cm of room all the way around. This will leave enough space for the cable and is how they are spaced from the factory.
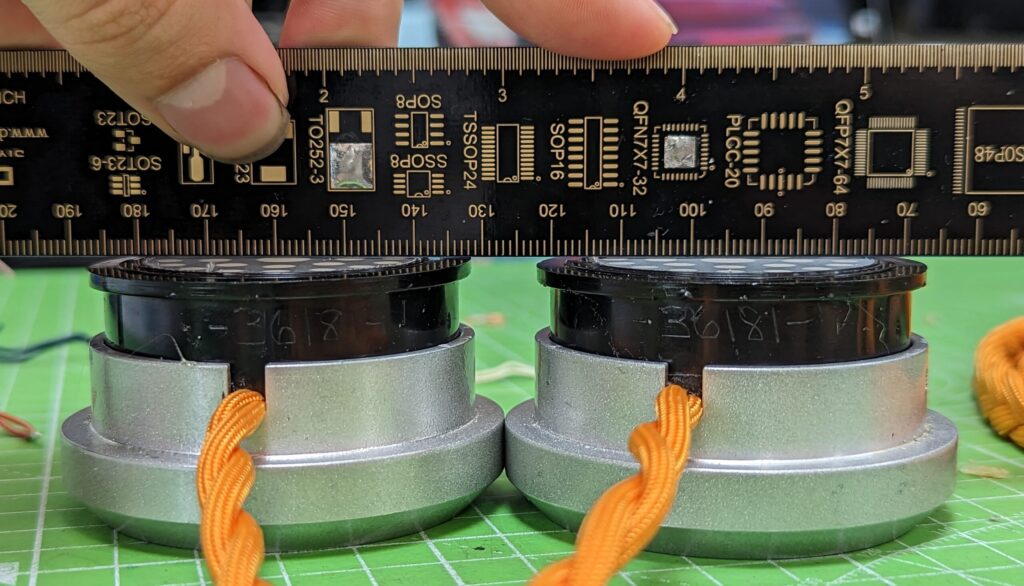
I use a ruler to make sure both drivers are eavenly spaced and parallel.
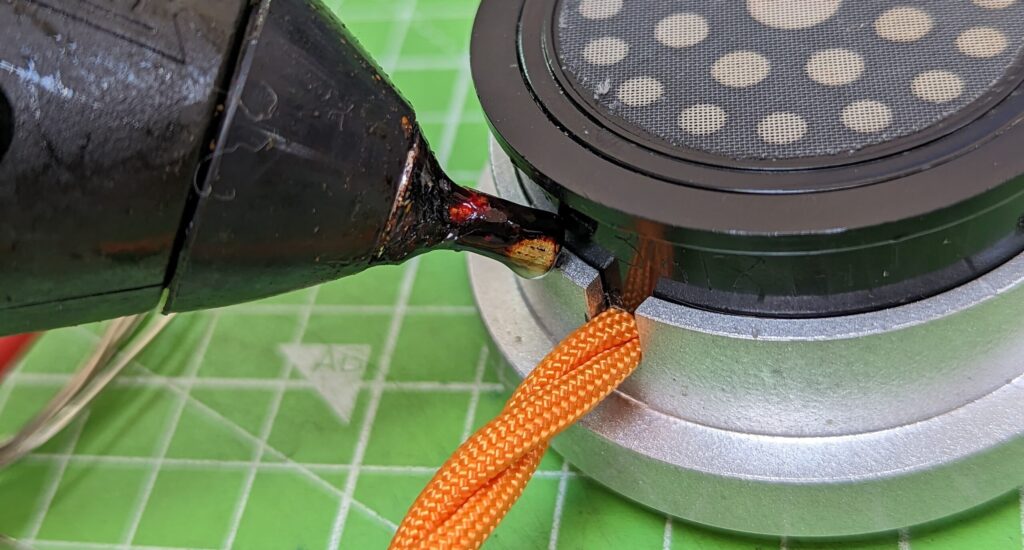
I use a hot glue gun to run a bead around the lip of the intersection here. This way holds together nicely and makes the headphones easier to service in the future for cleaning out dust and future cable replacements. You can use the IPA trick again and have them open in moments. This seam is also hidden by the pads so the headphones look no different.
Pretty happy with this one. The nozzle of the glue gun can be used to push the glue into the crevice whilst also forming a nice filleted transition. The trick is starting with your hand in a position to do the whole circle in one go. That and flow consistency. Ultimately, as it cannot be seen, this barely matters.
Assembly is the reverse of disassembly. Before you put the cups back into the fork, check your left and right. I use this video:
Put the cups into the corresponding forks and get the pads back on.
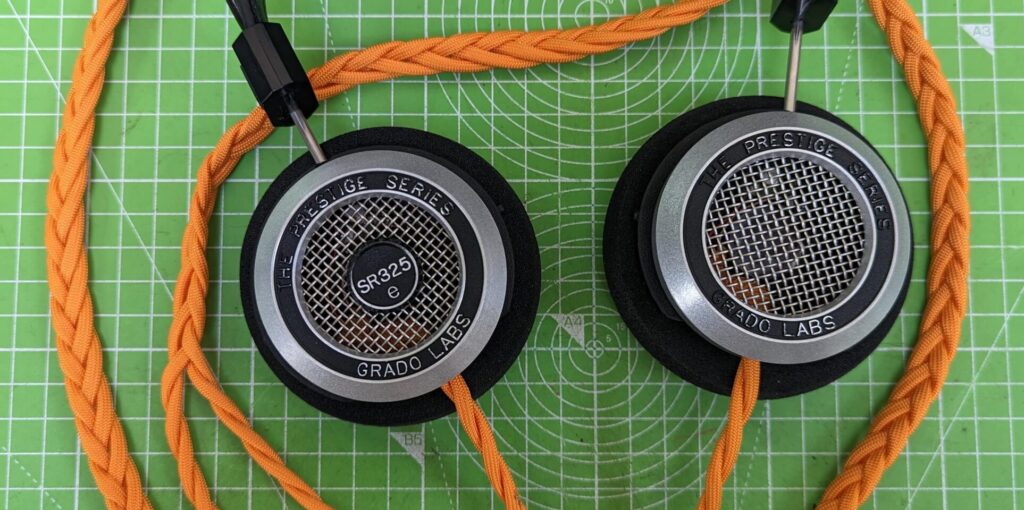
We are missing a name plate on this pair. No luck from Grado but nothing a 3D printer cant fix.
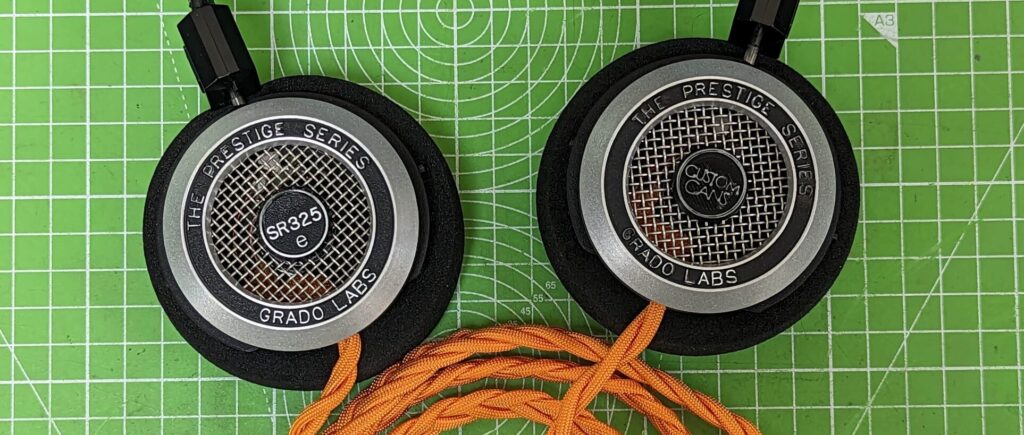
We got cheeky and whipped up one with a Custom Cans logo. Jason highlighted it with a sharpie and it looks a bit better than before.
We might not have bothered but this plate does actually have an effect on the sound. Its better to have the channels matching after all. We even did a better job of getting it in the middle than Grado.
Jason had a go at reviving some of the faded silver lettering with the sharpie but the effect was more miss than hit. Still far better than nothing and takes about 50k miles off this pair.
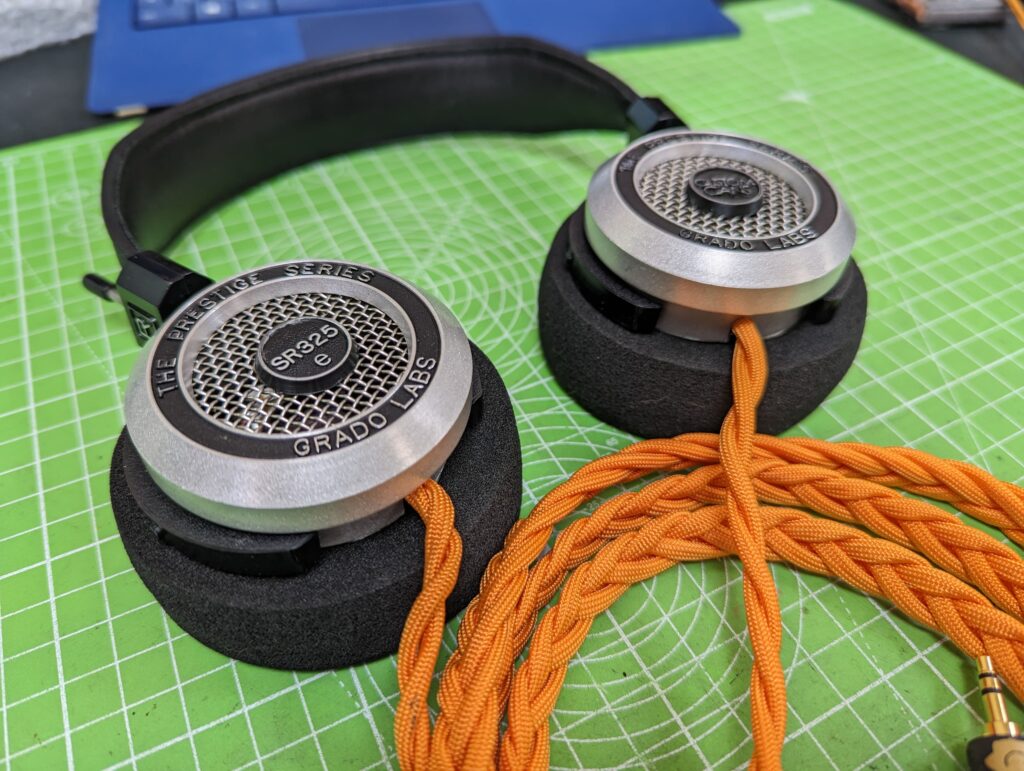
With that we are done. This mod is very easy and should honestly be attempted by anyone with a little bit of soldering experience. If your headphones are broken then its a no brainer. The Grado cable is notoriously awful and literally petrifies itself over time. The new soft, flexible cable is lighter, less microphonic, more durable and looks better. Give it a go. Or just send them to us and we will do it for you 🙂
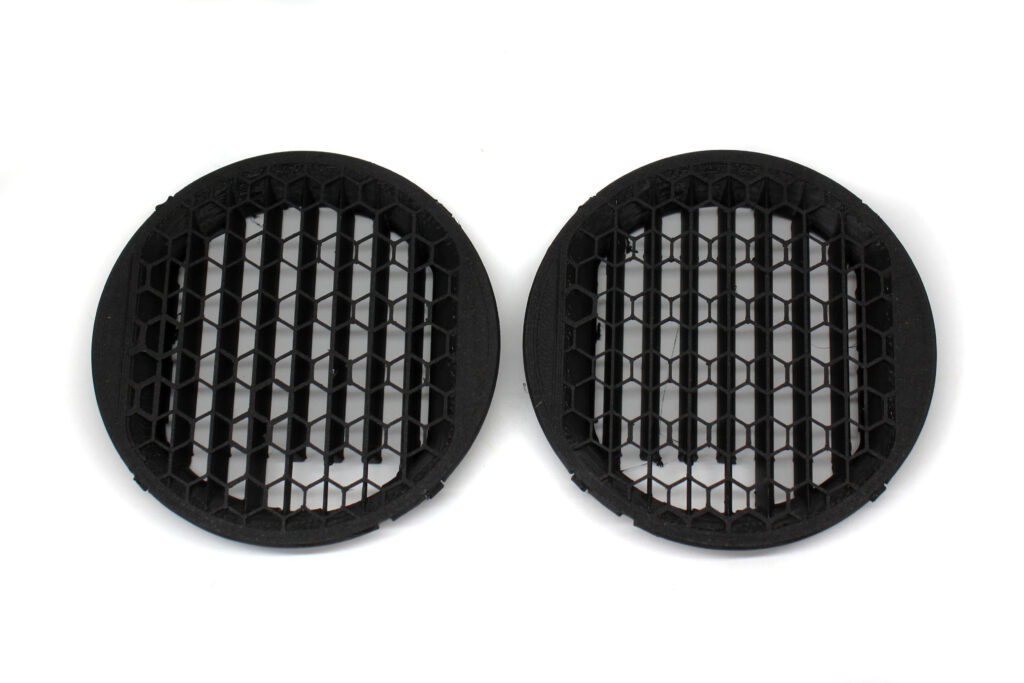
New Product! 3D Printed HiFiMan HE400se Super Grills
Jason has been hard at work, developing this new mod for the HiFiMan HE400se. It is a 3D printed grill mod for the ear cup. These inserts replace the original grills to make them sound more open. They re-tune them to keep the bass flat down to 15hz rather than rolling off at around 40hz, giving slightly more sub bass. It also smooths off some other areas of the frequency curve.
We were very impressed with the price to performance ratio of the stealth magnet version of the HE400se and decided to see how much extra goodness we could squeeze out of them. After months of re-designing the enclosure from scratch, it turns out they have a lot to give. We have improved the airflow which has given them deeper, punchier and more accurate bass. We also put a lot of work into the inside of the ear cup, which gives a much more open and airy sound, with a much wider sound stage.
You can purchase a Pre-Modified pair here: https://jfunk.org/wpc/product/modifie…
You can buy just the grills already printed here: https://jfunk.org/wpc/product/3d-prin…
Or if you want to print them your self or have them printed locally here: https://jfunk.org/wpc/product/hifiman…
Watch Jason’s video on the mod here:
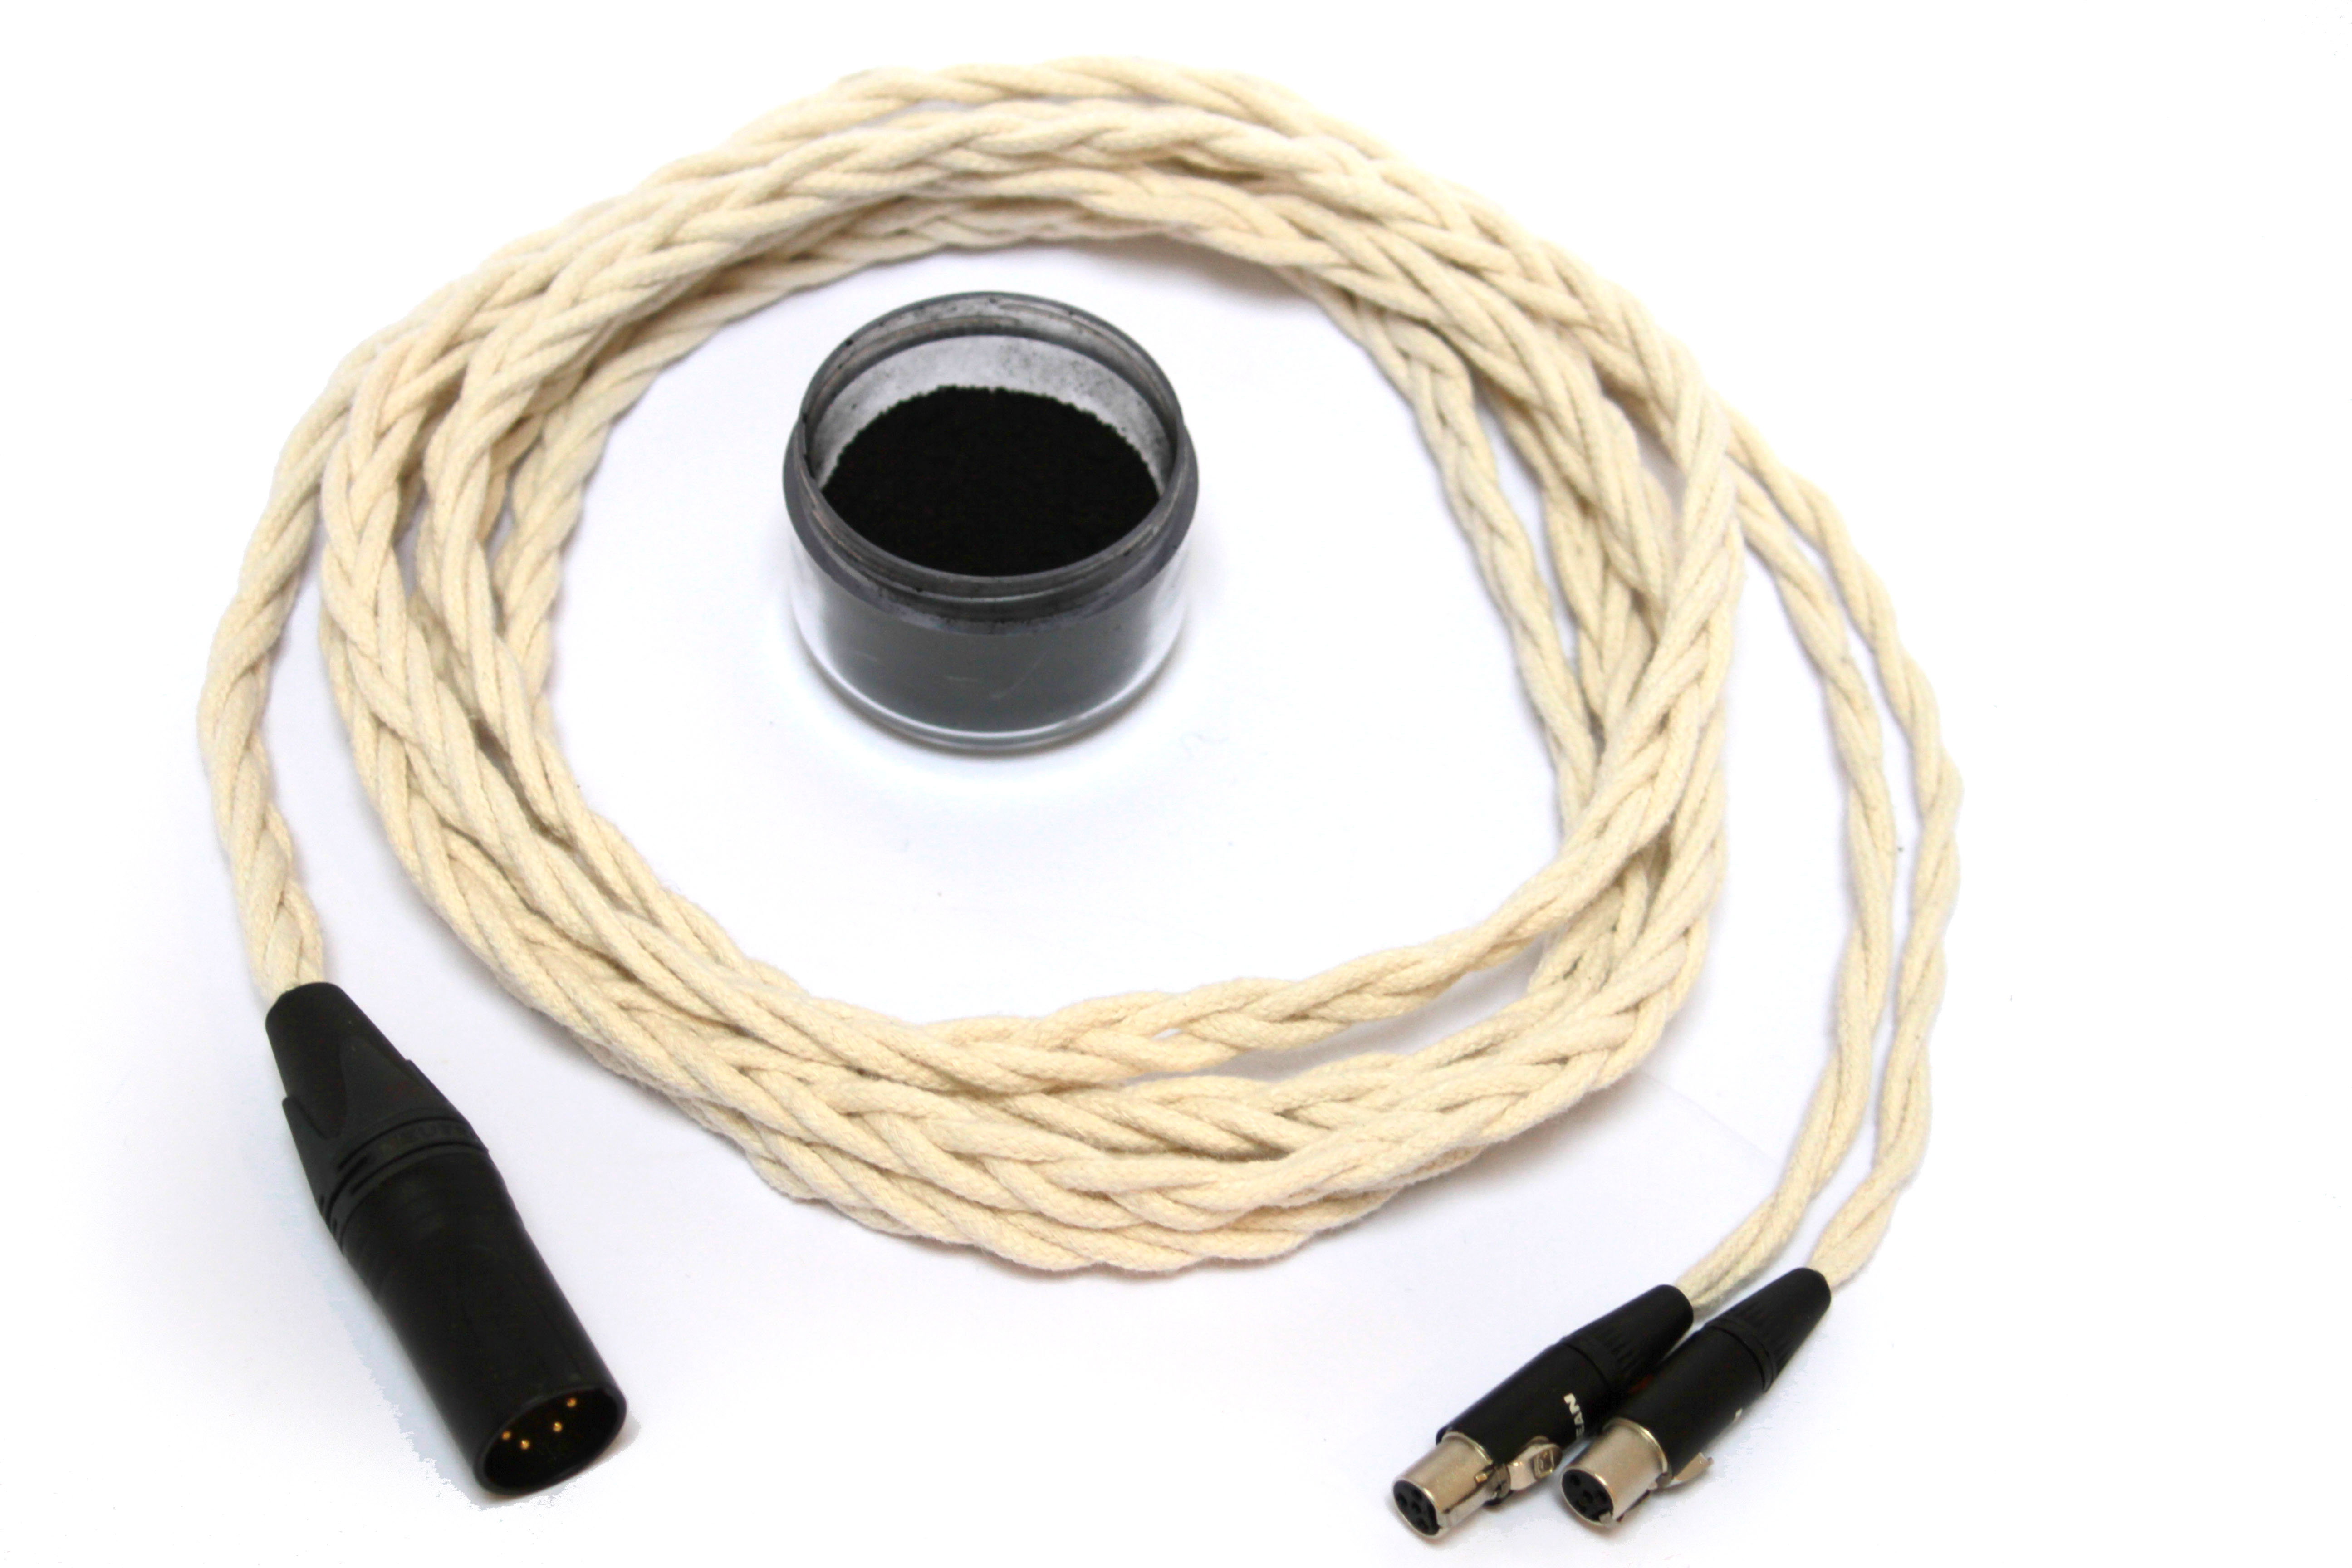
Operation Dark Matter
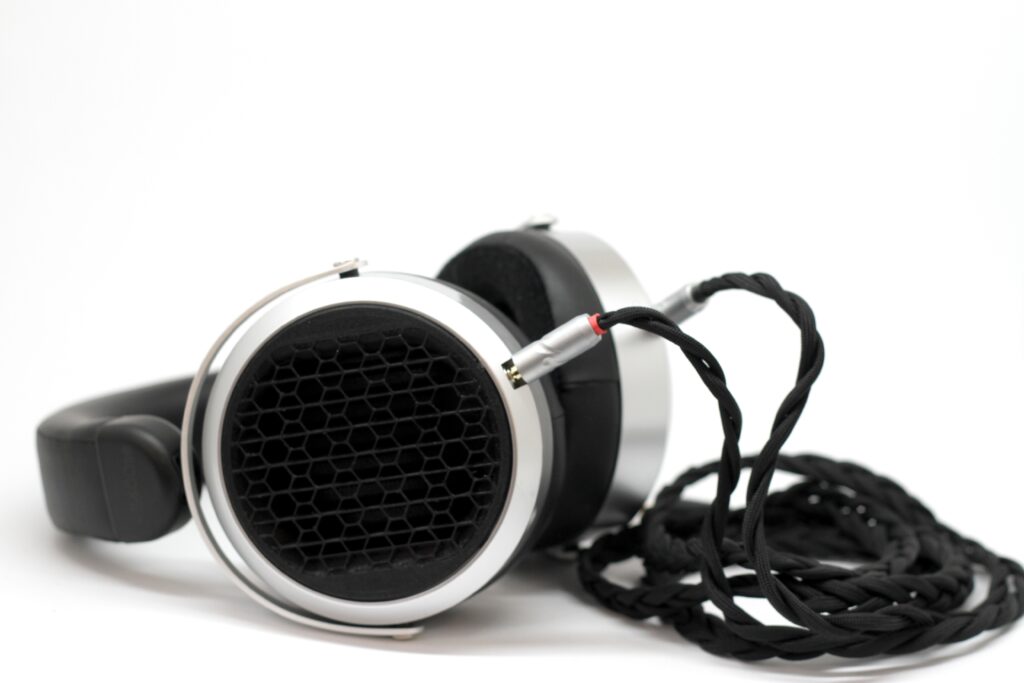
We have been working on a new range of cables with a few improvements. Firstly we will be using a cotton cover rather than nylon and more excitingly we will be coating our Litz wire in graphene to add shielding without adding too much weight. We have made a few test cables by hand coating the wire but are now putting the finishing touches on a machine to coat it an anneal it automatically.
Here is a look at one of our test cables.
It is a balanced Audeze LCD cable with our new graphene coated ( dark matter ) wire.
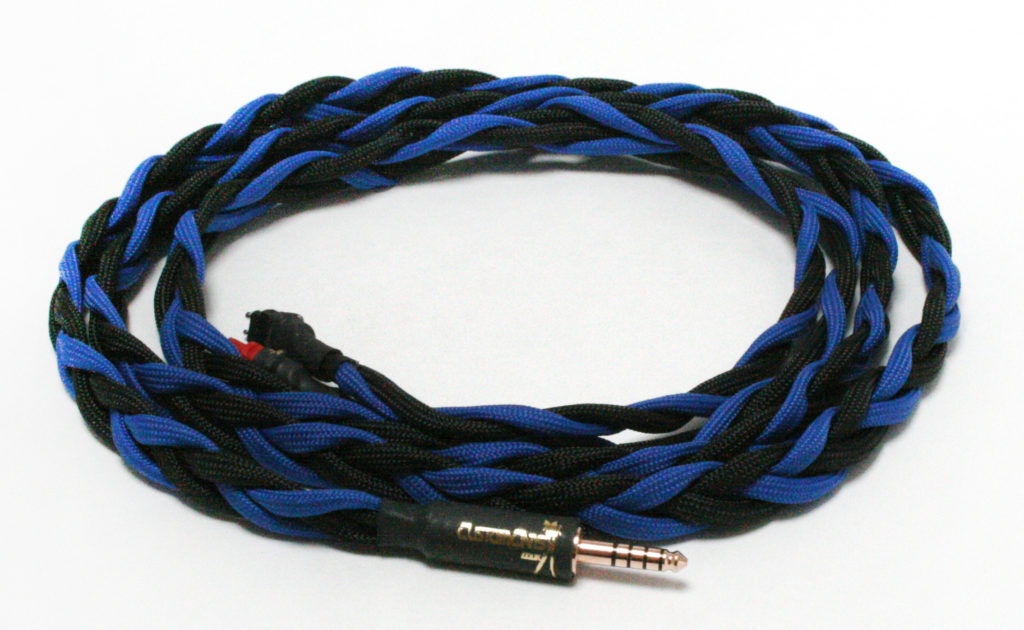
4.4mm balanced Sennheiser HD650 cable
It looks like 4.4mm TRRRS balanced jacks are becoming more common now. They are good for us as they fit out fat cables much better than most 2.5mm balanced jacks.
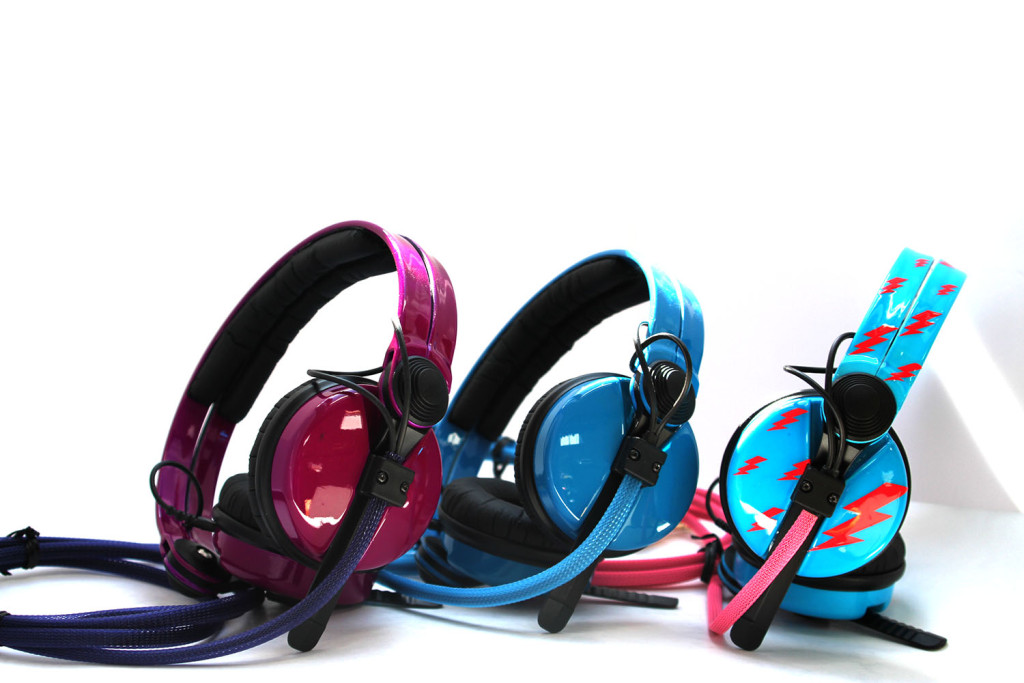
I’m back – and knocking out a lot of headphones over the next couple of months
After a long break while I have been studying product design, I am back in the spraybooth and making some fancy headphones.
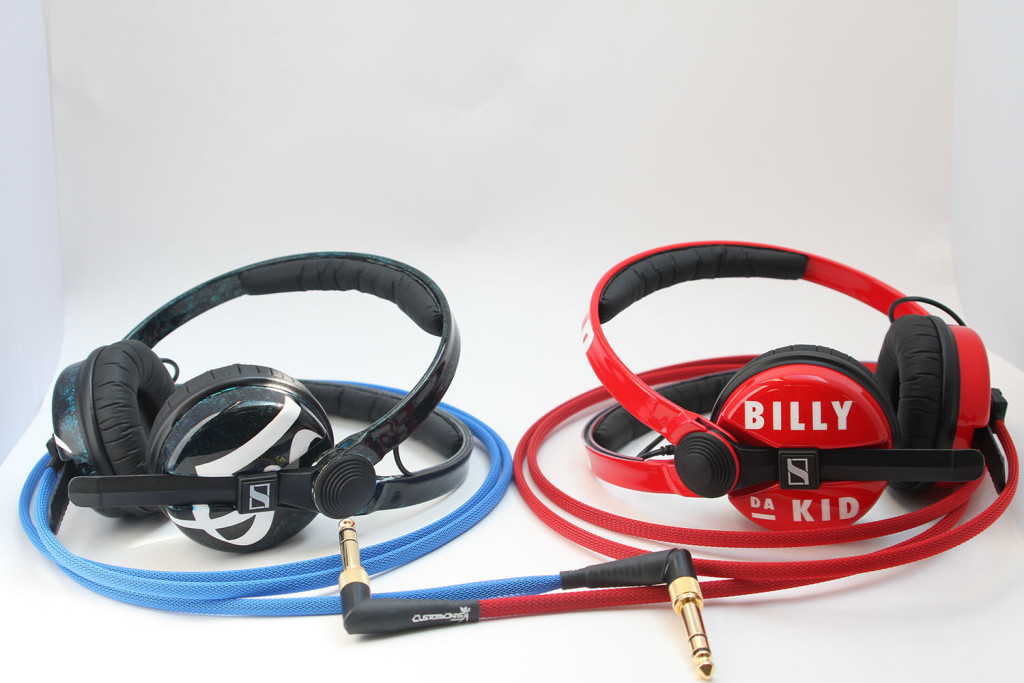
Here are some of the more interesting sennheiser HD25s we have done recently


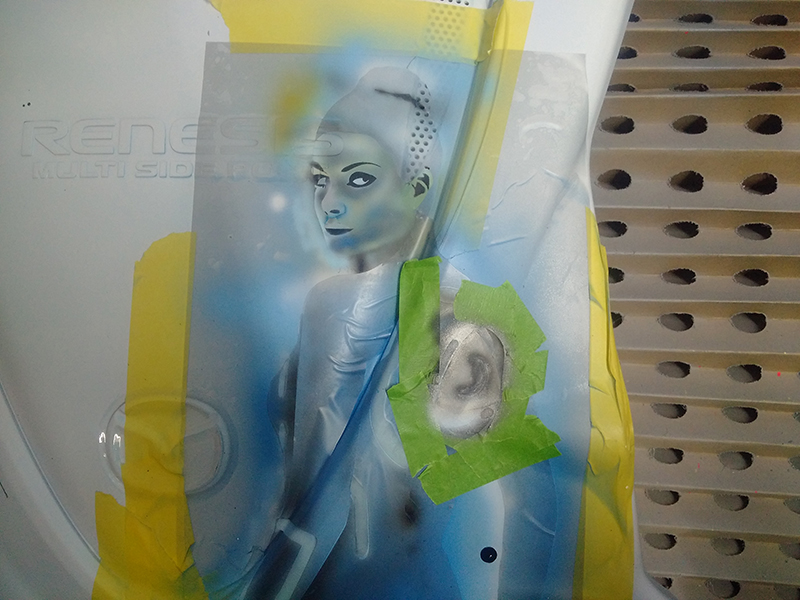
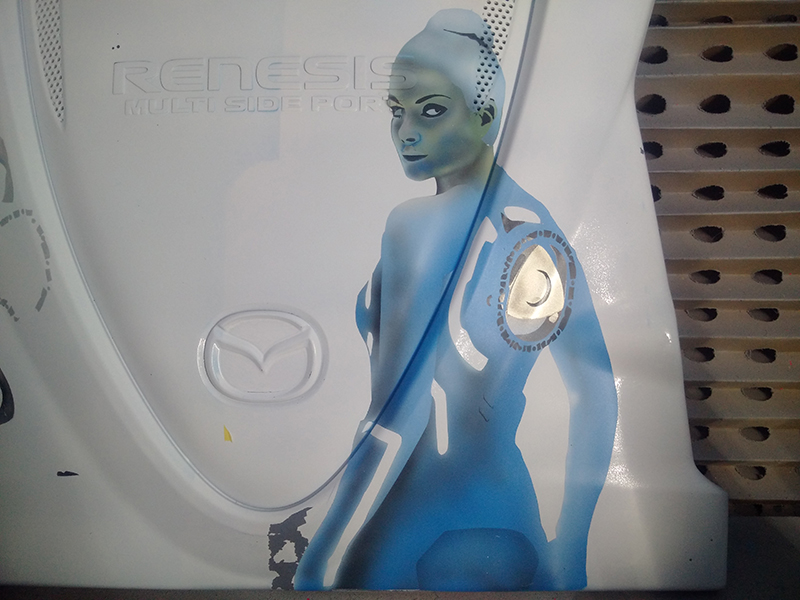
Engine cover phase 3
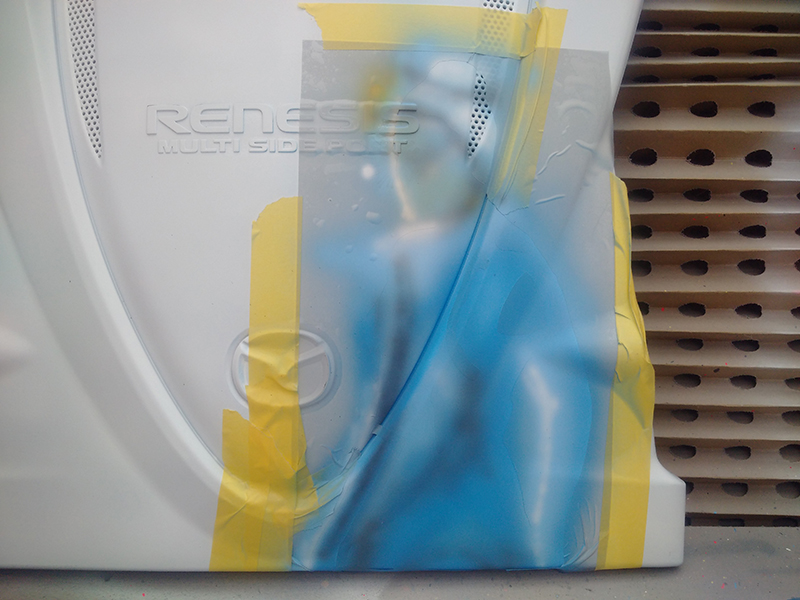
filling in the background
Here I have hit it up with some mazda 29Y to match the rest of the car
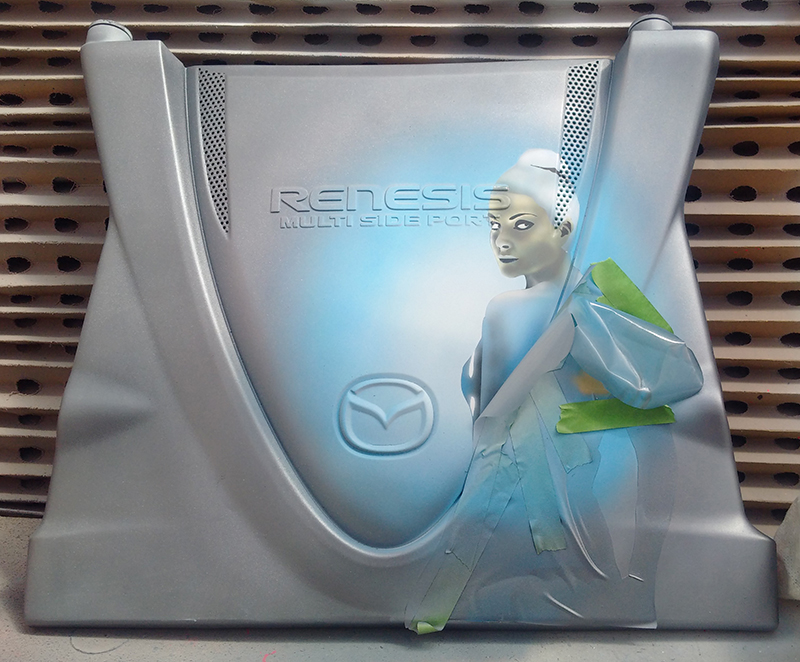
on second thoughts – black is better
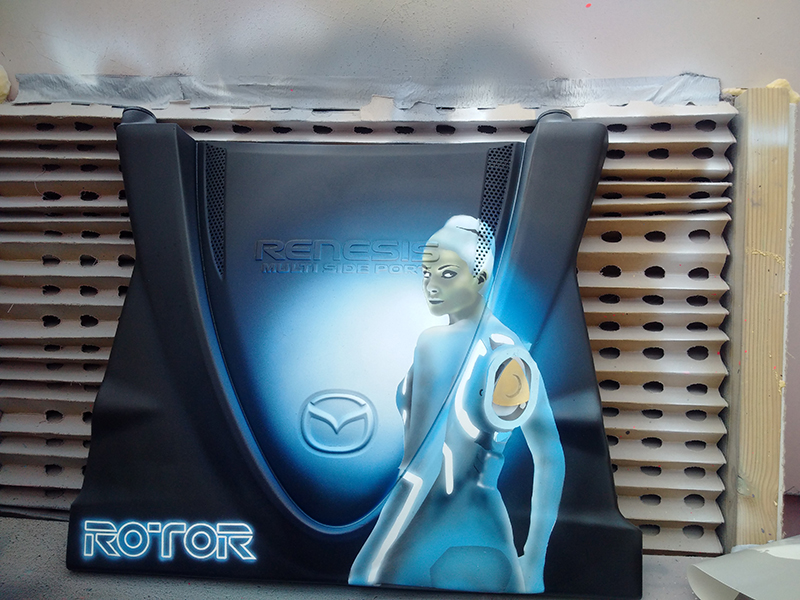
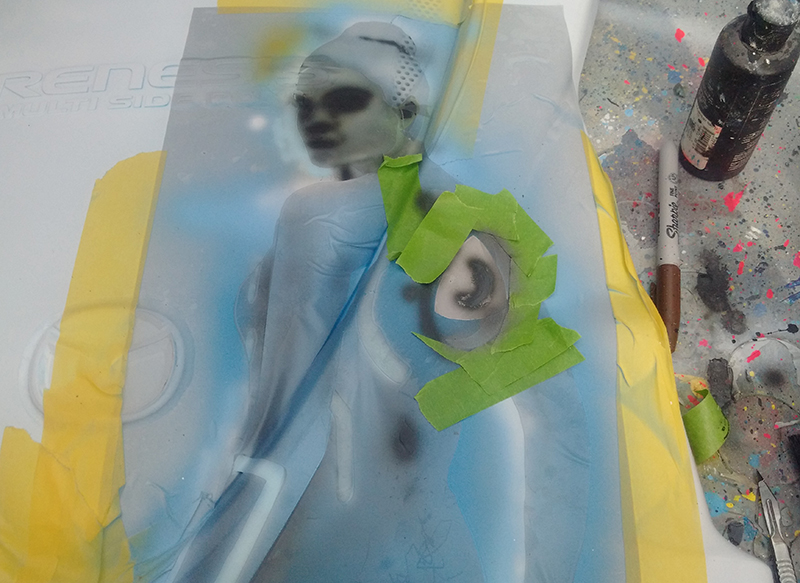
Engine cover Phase 2
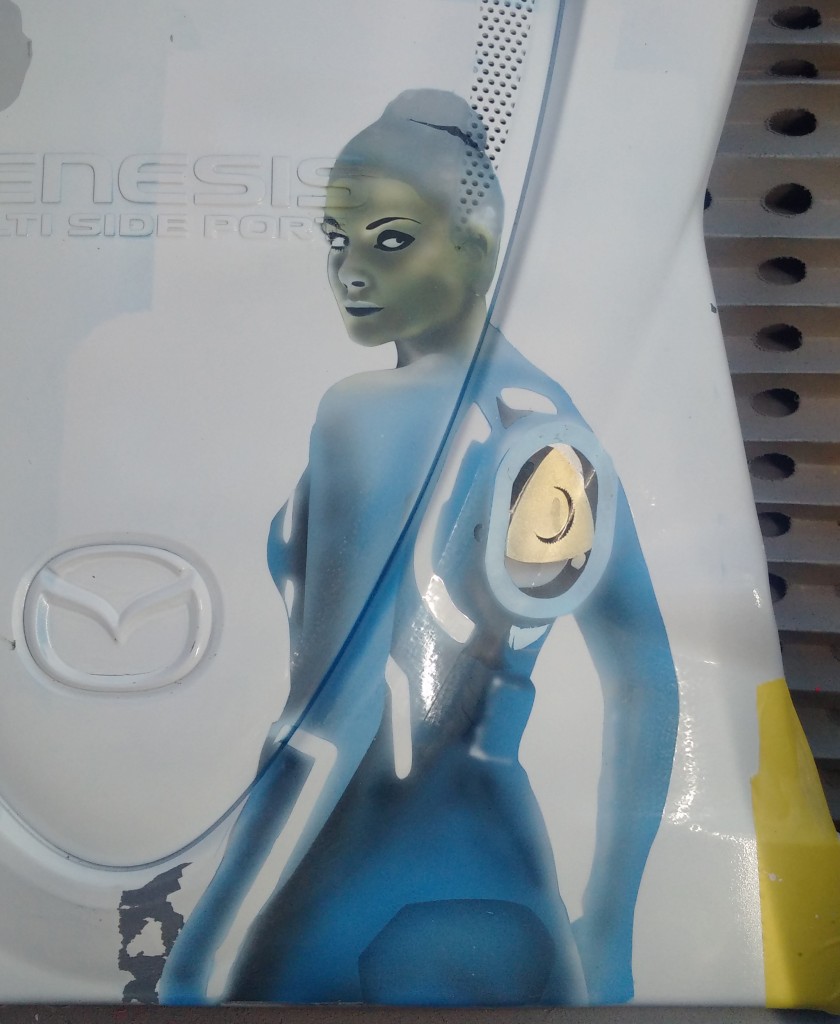
I have now gone back in and added a bit more light, shade and detail
Airbrushing an engine cover for the CanMobile ;)
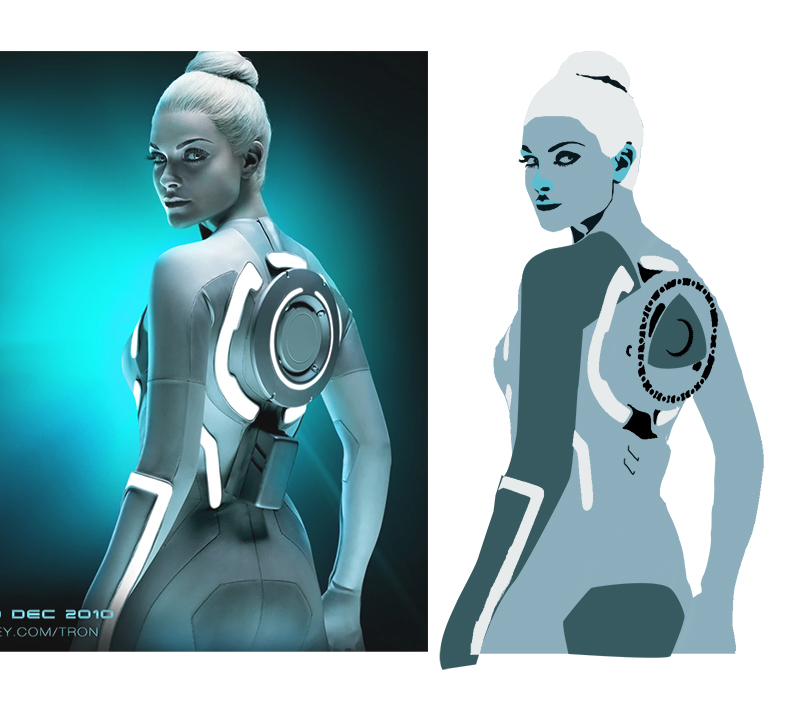
Phase one the design. I wanted to make something like Gem from tron with a rotary backpack
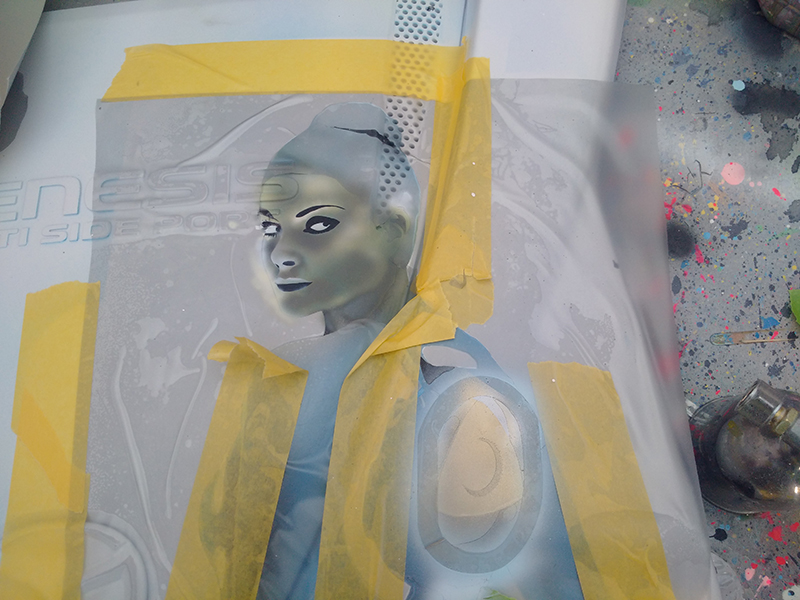
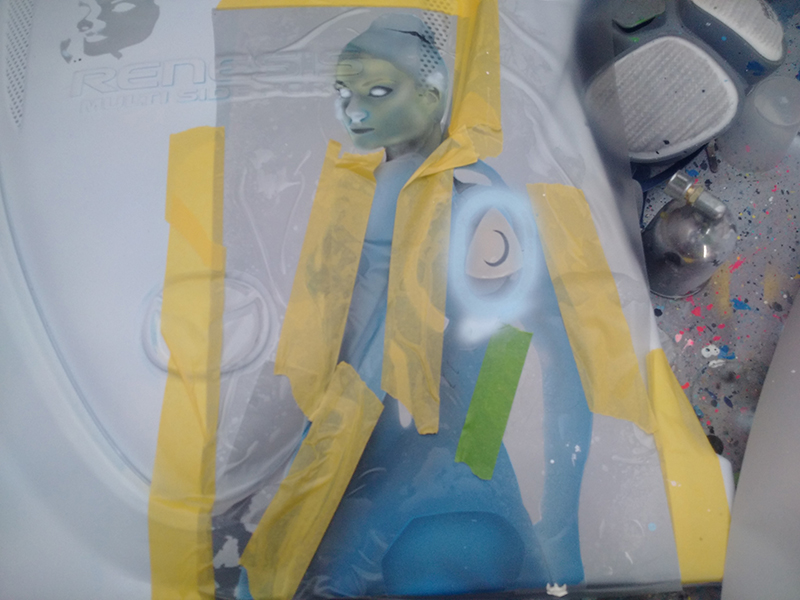
Next a bit of masking and spraying
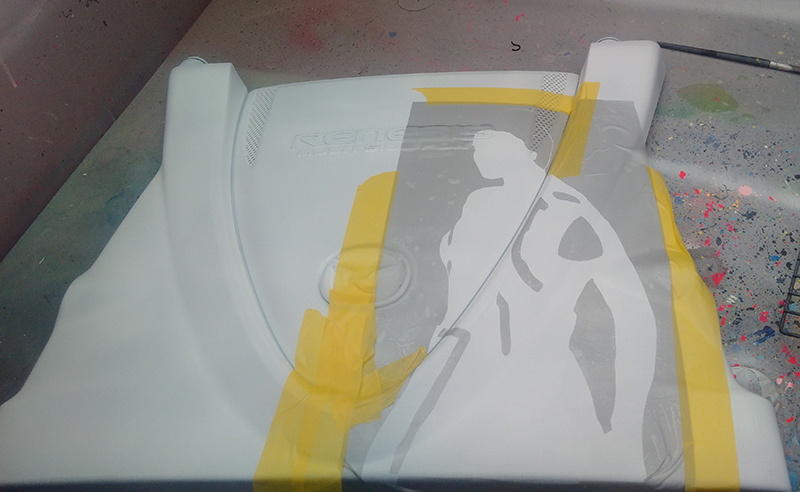
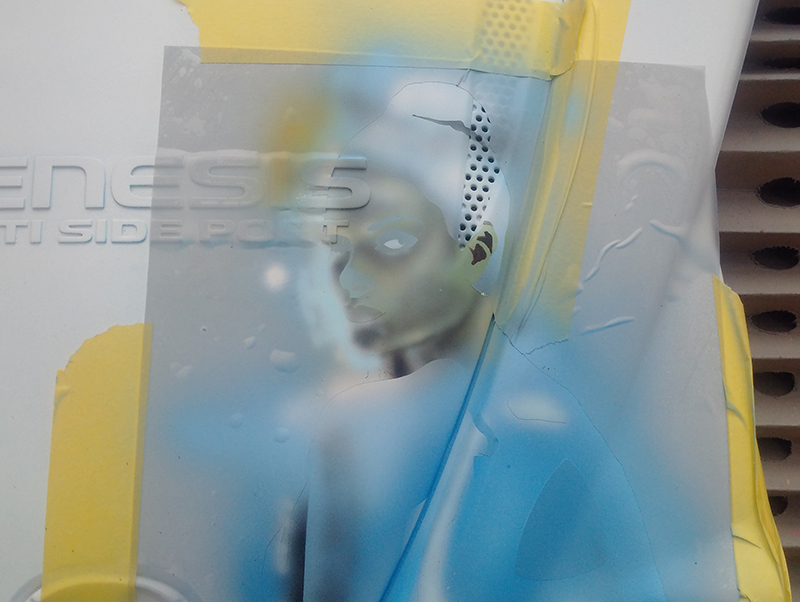
Phase one complete – time to spray it with a mid coat so I can have a certain amount of “undo” when I put in some more detail
Modifying the AKG K702 to take a balanced connection
We spend a lot of our time modifying headphones to take a balanced connection from and am or DAP – it think this is the first pair a AKG K702 we can done. We were lucky enough to have a 4pin socket just the right size to fit in the original hole. Here is a handy video of the operation which may help if you fancy doing a bit of DIY or if you would like us to perform a similar operation on your headphones just let us know